Bal-tec™ Home Measuring Sphericity
Measuring Sphericity
These notes are in answer to questions posed to one of our foreign representatives by his customer, as to our ability to measure sphericity with an uncertainty of one micro inch (25 nanometers). To begin the explanation, the number of parameters involved in our error budget for the sphericity measurement is very small, when compared with a linear measurement. On this short list we have the axis of rotation, the mechanical hysteresis and the amplification of the instrument.
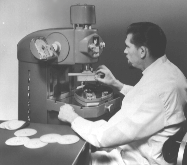
Normally temperature is a major issue in any serious metrology, but the rotating spindle type instrument that we use is insensitive to temperature and only requires thermal equilibration. Temperature is even less of a factor because each actual measurement takes less than one minute. The commercial instrument that we use is the Talyrond (see our paper "How Balls are Made, How They are Measured and How They are Used in Metrology"). The manufacturer's specification for this machine is a system accuracy of plus or minus one microinch or two microinches on radius, but it is actually somewhat better than this.

We use a fixed sensitivity or magnification, from the pickup through the electronics package to the recorder that is 20,000 times. This sensitivity is confirmed with a flick standard and a sign bar fixture. Both of these calibration devices are traceable to master gage blocks calibrated traceable to NIST. Errors in this parameter are so small that it would have an insignificant effect on this error budget. See Dr. Heinrich Schwenke's doctoral thesis on gage uncertainty, where he basically says don't sweat
The problem of mechanical hysteresis gets a little sticky. It is divided into two categories. The first and by far the most serious are the frictional forces that occur between the stylus and the test part during rotation. Here we have a strong ally in the nature of the spherical test specimen. The multidirectional curvature of the sphere pretty well eliminates any Z-axis modulation of the test probe against the almost perfectly stiff ends of the transducer ligatures.
Once the spindle is rotating, torque of the stylus is not a factor, because the sub-microinch surface texture of the high quality ball does not vary, so the position of the stylus will not be caused to vary either. Finally there is no stick and slip within the transducer as its design is pure flexure, with two non-contact cores modulated into and out of two inductors.
The force applied by the test probe must be very small to minimize hysteresis caused by friction. This force is verified with a dynamometer. The contact geometry of the stylus is a hatchet form with a small radius in the horizontal direction and large radius in the vertical direction, for the same reason. Going back to the sign bar fixture used in the sensitivity evaluation, if there were any horizontally oriented hysteresis in the system it would be instantly detected during this test.
We do not allow the use of computer centering algorithms; but instead, we mechanically adjust the coincident alignment of the spindle axis with the axis of the subject. The dilemma here is to eliminate the limacon errors associated with deviation in the test circle and test probe tangency. Through careful planning and execution these first factors are held to the insignificant level of a few nanometers.
The last and most serious error source is in the axis of rotation. The hydrodynamic bearing used in the Talyrond damps out all short perturbations so that only low harmonics and primary shifts in the axis remain. Reversal technology is used every single day to confirm the general accuracy of the spindle's axis of rotation. When really serious measurements must be made, data collected from the reversal procedure can be used to improve the measuring accuracy. The procedure used, consists of measuring a single circumference of a high quality sphere and then rotating the sphere 180 degrees and measuring it again. The spindle error will remain in the same location, and the error of the sphere will move 180 degrees. We manufacture several versions of a reversible master spheres for axis of rotation verification
When all is said and done, we depend on our laboratory spherometer to evaluate the master spheres that we use as the final word for sphericity. This instrument has the ability to determine absolute sphericity of a ball to plus or minus one nanometer. This is done by using the diameter of the ball as a reference datum in a kinematic system. This procedure uses fundamental physics and reversal technology to achieve the present ultimate in roundness measurement. This process requires several hours per ball to measure, hours of meticulous cleaning and 24 hours of soaking. It is totally impracticable for anything but research and reference masters.
See also, our Technical Data Sheet 15, about the Talyrond machine.
